Monday, March 11, 2013

CA trials and no-till equipment

Meet Rachael Cox. She coordinates MasAgro experiments for CIMMYT. She showed me the conservation agriculture (CA) trials here at the El Batán station.  These are long-term CA trials.


They's also developed a two-wheel tractor for no-till. I've seen these all over Asia, but they they are very expensive here because of the shipping from China.

They've designed a lot of equipment, and you can download the drawings here:
http://conservacion.cimmyt.org/index.php/es/maquinaria


Sunday, March 10, 2013

Empleo nuevo con CIMMYT

After 3 years with the SANREM CRSP at Virginia Tech, in which I did very little actual agronomy, I have a new job - my dream job!

Tomorrow I will begin my new position as Cropping Systems Agronomist with the Conservation Agriculture group at CIMMYT in Mexico.

CIMMYT is a Spanish acronym which stands for the International Center for the Improvement of Maize and Wheat. They are THE cream of the crop when it comes to development of agronomic systems in the developing world.

Twin-row wheat trials outside the window of my apartment at CIMMYT.

Thursday, May 14, 2009

First day in China

Ok, so really all we've done is walk around, eat, and explore our immediate surroundings. But here are a few photos of the market and a food stall.


First, select the kind of noodles you want, then they add the ingredient. She was nice enough to ask if we wanted hot stuff. I did, but just a little.

The stove is heated with coal briquettes.


Which chicken would you like for dinner?


Pickled garlic. Emma would go crazy for these!

The largest sunflower seeds I've ever seen.

Did I mention that the gov't took our temperatures before we left the plane? They're on the lookout for swine flu. They also gave us all thermometers when we got to our dorm rooms last night. We have to record our temperatures morning and evening for five days. If they think you have it, you get quarantined for 13 days!

Arrived in China

Finally arrived in China after an epic 30 hour journey! Haven't seen much yet, but we had a great dinner last night.


Finally arrived in China after an epic 30 hour journey! Haven't seen much yet, but we had a great dinner last night.

I'm here to take a 3-week plant breeding class at Northwestern A&F University, in Yangling, Shaanxi, about an hour outside Xi'an, in central China.

Today i'll be exploring, trying to find things i need (a mattress, pillow, food, a dictionary, etc.). Thankfully, we have Lilly-Anne, who speaks Mandarin.


Saturday, May 2, 2009

How to set up irrigation

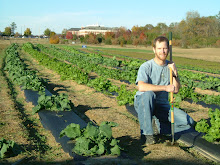
A couple days ago, I spent most of the day setting up irrigation for the Community Garden.

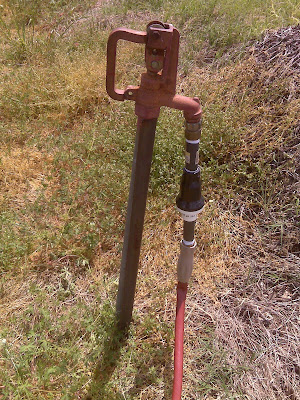
First, put a pressure reducer on the water tap. This reduces the pressure to 12 psi.


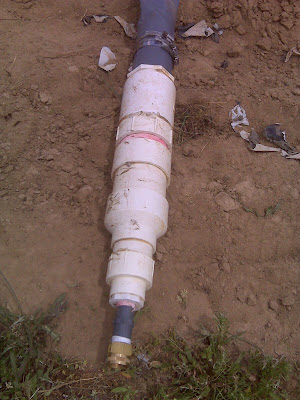
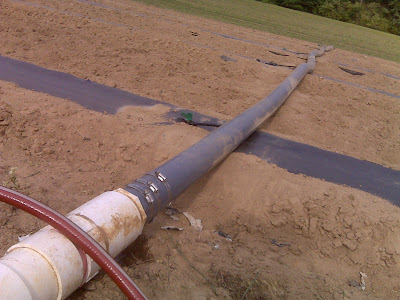
Next, hook up the hose line to a jimmy-rigged construction of various PVC fittings to allow a connection to the "lay-flat".

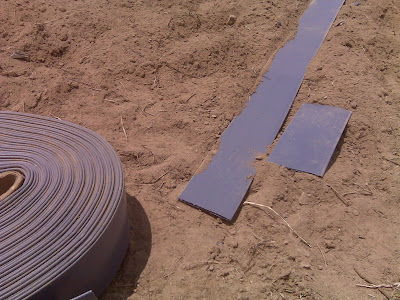
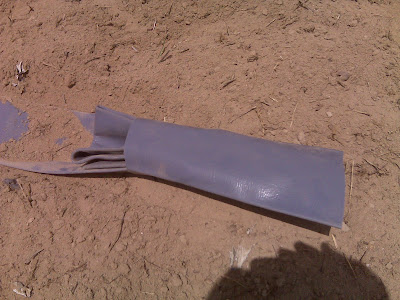
This is a roll of lay-flat. It is the central distribution line for irrigation in the field.
It must be kept in a straight line so that it won't kink when it fills up with water.

The end of the lay-flat. When you reach the end of the field, cut off the roll, leaving 2-3 feet extra so that you can fold it twice to seal off the end. Then cut off about a foot or so, which will slide onto the folded end to make a cheap cap to the end of the lay-flat.

Stuff the twice-folded end into the sleeve to form a (mostly) water-tight seal.

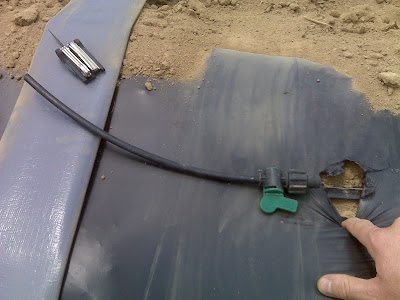
Next, hook up the field lines. This is done by piercing the lay-flat with a piece of polytubing. The polytube should insert all the way into the lay-flat so that it doesn't pull out when the lay-flat inflates with water. Then slip the polytube into a connector, in this case a stopcock that will allow me to shut off certain lines when i want to.

Drip tape is below the plastic mulch. Our drip tape has "emitters" that allow a drip every 12 inches.
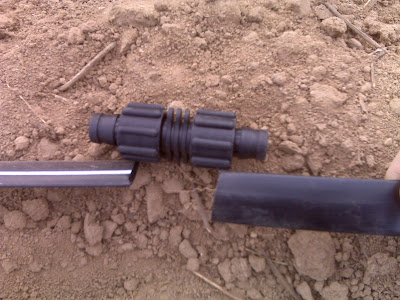
The stopcock slides into the t-tape and seals using a screw.
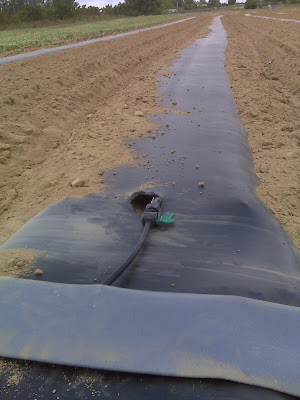
The field lines.

But the end of the drip tape still isn't sealed!

This year, i wanted to put some extra land into production for growing corn. Plastic is too expensive to use on corn, so i will just grow it on bare ground. My plan is to hook up extra drip tape over the bare ground and grow the corn at each emitter.

In this case, i connect more drip tape to the end of the field lines using a connector.

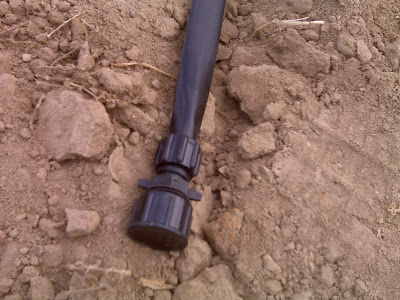
The end of the drip tape can be sealed by using a cap, or more cheaply by simply folding the end and sliding it into a sleeve, as we did with the lay-flat.

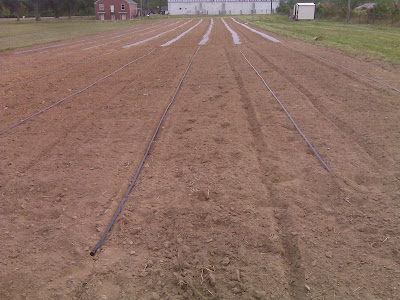
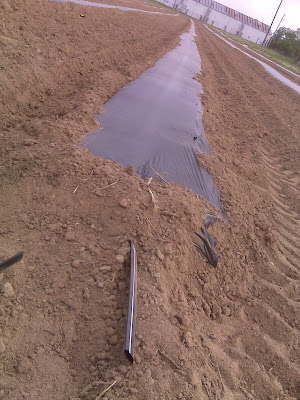
A view from the north end of the field.

Turn on the irrigation, and the lay-flat balloons into a giant pressurized cylinder.

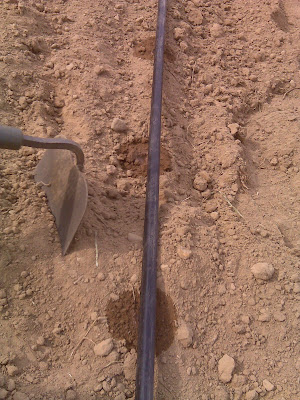
The wetting pattern can be seen here. The hoe is for scale. The advantage is that we can inject fertilizer and water directly to the crop roots, instead of broadcasting fertilizer, which will also fertilize weeds!

We can also reduce disease by keeping the leaves dry while irrigating. Overhead irrigation gets the leaves wet, which invites fungal disease. Additionally, we can reduce the amount of fertilizer and water applied since we are applying it over a smaller area.

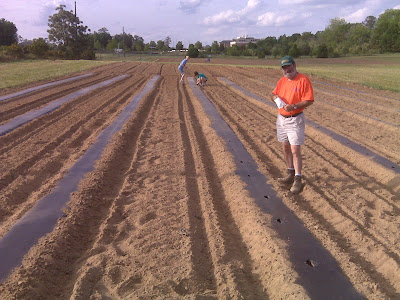
Once the ground is wet, go ahead and start planting!

Yesterday, we planted the entire corn field, 3 rows of tomato seedlings, and 2 rows of squash, thanks to our wonderful volunteers!

Thursday, April 30, 2009

Tilling the garden

Tillage of the corn field is happening as I write! Been in the field all day hooking up irrigation. More on that soon.
Sent via BlackBerry by AT&T

Friday, April 17, 2009

Soil mapping

I've been helping out with soil morphology labs this semester. We spent the last couple of weeks on a soil mapping exercise.
First you start with a map of the area of interest, and locate boring holes.


Once you reach the boring location, you use an auger to bore down to the depth of interest.

Each auger-full of soil is laid out neatly with stick to mark the depth of the auger bucket. Here, the top of the soil is marked with the leaf, and bottom depth is in the upper left.

Some of the soil horizons are clearly visible in this photo.

Each horizon is textured (for the amounts of sand, silt and clay), colored, and noted for other characteristics of interest.

This information will be placed into a GIS application, and a soil map will be made. Maps are then used to determine hydrology, yield potential for various crops, engineering properties, and many other applications.